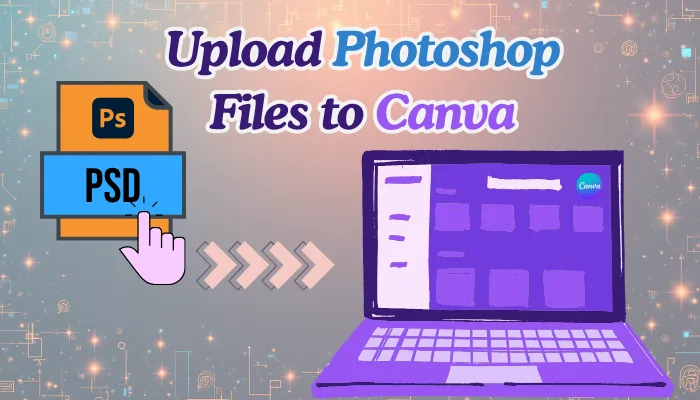
Canva has revolutionized the design workflow by introducing direct import capabilities for Adobe Photoshop files.
If you’ve been manually recreating your Photoshop designs in Canva or converting them to basic image formats, there’s now a better way.
This comprehensive guide will show you exactly how to upload Photoshop files to Canva while maintaining editable layers, fonts, and design elements.
You’ll learn the step-by-step process, understand what transfers successfully, and discover best practices for seamless PSD to Canva conversion.
Understanding Canva’s Native PSD Import Feature
Canva now supports direct import of Adobe Photoshop files, eliminating the need to flatten your designs or lose layer structure.
This feature represents a significant advancement in cross-platform design compatibility, allowing you to bring your PSD files directly into Canva’s editor where many elements remain editable.
This import functionality is currently available as a beta release exclusively on canva.com through desktop browsers.
Mobile apps and the desktop application do not yet support this feature.
As a beta feature, Canva continues to improve the conversion process based on user feedback and usage patterns, which means you can expect enhanced compatibility and better element retention in future updates.
The native import feature supports PSD files up to 300MB in size and can handle designs with layers, gradients, masks, and up to 100 fonts.
While some complex elements may be rasterized during conversion, the majority of your design structure, including text layers and individual elements, will remain editable in Canva’s environment.
Method 1: Import PSD Files Directly from the Canva Homepage
The Canva homepage provides multiple entry points for uploading Photoshop files directly into the platform.
This method is ideal when you’re starting a new project or want to organize your imported files before editing.
Step 1: Navigate to Your Canva Homepage
Open your web browser and go to canva.com.
Log into your Canva account if you’re not already signed in. Make sure you’re viewing the homepage, which displays your recent designs, templates, and navigation menu on the left side. This is your central hub for all Canva activities and file management.
Step 2: Drag and Drop Your PSD File
- Locate your Photoshop PSD file on your computer using File Explorer on Windows or Finder on Mac.
- Click and hold the file, then drag it directly onto your Canva homepage.
You can drop it anywhere on the page.
Canva will immediately begin processing the file and display a progress indicator showing the upload status.
This drag-and-drop method is the fastest way to get your files into Canva.
Step 3: Alternative Upload Using the Upload Button
- If you prefer not to drag and drop, click the Upload button located in the top corner of the homepage banner.
- A dialog box will appear where you can either drag your PSD file or click the browse option to navigate through your computer’s folders.
- Select your Photoshop file and click Open.
- The file will begin uploading and processing automatically.
Step 4: Upload Through the Projects Menu
Another approach is to use the side menu on the homepage.
Click on Projects in the left sidebar, then navigate to your Uploads section.
Here you can drag your PSD file directly to the page, or click the Upload button to browse and select files.
This method is particularly useful when you want to organize multiple uploads or access previously uploaded files.
Step 5: Access Your Imported Design
Once the upload and conversion process completes, your imported Photoshop design appears in your Uploads folder.
Click on the converted design thumbnail to open it in the Canva editor.
The design opens as a fully editable Canva project with layers, text, and compatible elements ready for modification.
Pro Tip: Keep your original PSD file organized on your computer with a clear naming convention. While Canva imports the file successfully, maintaining access to your source files ensures you can always return to the highest-quality version if needed for significant revisions.
Method 2: Import PSD Files Directly from the Canva Editor
When you’re already working on a design project in Canva and want to import Photoshop elements or entire compositions, uploading directly from the editor streamlines your workflow without requiring navigation back to the homepage.
Step 1: Open or Create a Design in the Canva Editor
Launch the Canva editor by either opening an existing design or creating a new project.
You can access the editor from your homepage by clicking any design or by selecting a template or custom dimension.
The editor interface displays your canvas in the center with the side panel on the left for elements, uploads, and tools.
Step 2: Drag and Drop Directly to the Editor Canvas
Locate your PSD file on your computer and drag it directly onto the Canva editor workspace. You can drop the file anywhere on the canvas or in the gray area surrounding it.
Canva immediately recognizes the PSD format and begins the import and conversion process.
A progress indicator shows you how the upload is proceeding.
Step 3: Upload Using the File Menu
For a more traditional approach, click File in the top corner of the editor, then select Upload a file from the dropdown menu.
A file browser window opens allowing you to navigate to your Photoshop file location.
Select your PSD file and click Open to initiate the upload.
This method provides more control over file selection, especially when working with multiple files in different folders.
Step 4: Use the Uploads Tab in the Side Panel
Click on the Uploads tab in the editor side panel on the left side of your screen.
This tab displays all your previously uploaded files.
At the top of this section, click the Upload files button.
You can then select one or multiple PSD files from your computer, or drag and drop them directly into the Uploads tab area.
This approach is efficient when you need to upload several files at once.
Step 5: Add the Imported Design to Your Canvas
After your PSD file finishes uploading and converting, it appears in your Uploads tab.
To use the imported design in your current project, simply click on it from the Uploads tab.
The entire imported design will be added to your canvas as a group of editable elements.
You can ungroup these elements to work with individual layers, reposition them, or integrate them with your existing Canva design.
Note: When you import a PSD file directly into an existing Canva project, the imported design elements are added to your current page. If you want the imported design to maintain its original dimensions and layout without interference from existing elements, consider opening it as a separate design first, then copying specific elements you need.
Locating and Managing Your Uploaded Photoshop Designs
After successfully importing PSD files to Canva, knowing where to find and manage these uploads ensures efficient workflow and easy access for future projects.
Step 1: Access the Projects Section
From your Canva homepage, click on Projects in the side panel on the left.
This opens your project management area where all your designs, folders, and uploads are organized.
The Projects section serves as your central file management hub within Canva.
Step 2: Filter by Owner
At the top of the Projects area, you’ll see an owner dropdown menu.
Select your name to view only projects and uploads that you personally created.
Alternatively, select Any owner to view all projects, including those shared with you by team members or collaborators.
This filtering helps you quickly locate your specific uploaded files in collaborative environments.
Step 3: Navigate to the Uploads Folder
Within the Projects section, locate and click on the Uploads folder.
This dedicated folder contains all files you’ve uploaded to Canva, including your imported Photoshop designs, images, videos, and other media.
Your uploaded PSD files appear here as editable Canva designs, not as raw file downloads.
Step 4: Download or Delete Uploaded Designs
From the Uploads folder, you can manage your imported files. Hover over any uploaded design to reveal action buttons.
You can download the design in various formats, delete it to free up storage space, or organize it into custom folders.
Click the three dots icon for additional options like renaming, moving, or duplicating the design.
Step 5: Open Imported Designs for Editing
To work on any imported Photoshop design, simply click on its thumbnail in the Uploads folder.
The design opens in the full Canva editor where you can modify text, adjust elements, change colors, and apply Canva’s extensive library of effects, graphics, and tools to enhance your imported design.
What to Expect When You Import Photoshop Files to Canva
Understanding the technical specifications and limitations of Canva’s PSD import feature helps you prepare your files appropriately and set realistic expectations for the conversion process.
Supported File Specifications
Canva accepts PSD file types up to 300MB in size.
This generous file size limit accommodates most professional design projects, including those with multiple layers, high-resolution images, and complex compositions.
If your Photoshop file exceeds 300MB, you’ll need to optimize it in Photoshop before importing by flattening unnecessary layers, reducing image resolution, or splitting it into multiple smaller files.
Page and Artboard Limitations
Unlike Illustrator files which have artboard limitations, Photoshop designs imported to Canva have no page limit restrictions.
Your entire PSD file, regardless of the number of layers or complexity, will convert as a single Canva design.
This makes Canva particularly well-suited for importing multi-page presentations, social media template sets, or comprehensive design systems created in Photoshop.
Font Import Capabilities
Canva can import up to 100 different fonts from your Photoshop file.
During the conversion process, Canva attempts to match your Photoshop fonts with available fonts in its library.
When exact matches are found, your text appears identical to the original.
If an exact match isn’t available, Canva substitutes the closest alternative font, which may result in slight visual differences in typography.
Image Element Limitations
Photoshop designs can include up to 1200 images per page when imported to Canva.
This substantial limit covers virtually all design use cases, from photo collages to complex marketing materials.
Images are preserved during import, though their editability depends on whether they were originally vectors or raster graphics in your Photoshop file.
Layer, Gradient, and Mask Support
Canva supports designs containing layers, gradients, and masks during the PSD import process.
Your layer structure is largely preserved, allowing you to work with individual design elements separately in Canva.
However, certain complex effects, advanced blend modes, or intricate masking techniques may be rasterized, converting those specific elements into flat images that cannot be edited at the component level.
PDF Compatible Format Requirement Note
While this requirement applies specifically to Illustrator files, it’s worth noting that Photoshop files do not need to be saved in any special format.
Standard PSD files created and saved in any recent version of Adobe Photoshop are fully compatible with Canva’s import feature without additional export settings or format adjustments.
Pro Tip: Before importing large or complex Photoshop files, create a test version with simplified layers to verify how specific effects, blend modes, or design techniques convert to Canva. This preview helps you identify which elements may need adjustment after import.
Understanding Element Conversion and Editability
When you open Photoshop files in Canva, not all elements convert with the same level of editability.
Understanding what remains editable and what becomes rasterized helps you plan your workflow effectively.
Text and Font Matching
Canva makes significant efforts to identify and match fonts during the PSD to Canva conversion process.
The platform analyzes the fonts used in your Photoshop text layers and searches its extensive font library for exact or close matches.
When successful matches are found, your text remains fully editable with identical or nearly identical typography.
However, with thousands of fonts available across different platforms, exact matches aren’t always possible.
If Canva cannot find a matching font, it substitutes the closest available alternative. This may result in text that looks slightly different from your original Photoshop design, with variations in character width, spacing, or style.
After import, you can manually change the font to any available in Canva’s library or upload custom fonts if you have Canva Pro.
Color Editability in Imported Images
The ability to edit colors in your imported design depends significantly on the original image type used in your Photoshop file.
Vector-based elements created with shape layers or vector masks in Photoshop have a much higher chance of maintaining color editability in Canva.
These elements convert to Canva’s native shapes and graphics, allowing you to change fill colors, stroke colors, and gradients directly.
Raster images, including photographs, pixel-based artwork, or flattened layers, cannot be broken down into editable color components.
Canva imports these as fixed image elements where the pixel data is preserved but individual color areas cannot be selected and modified.
If color editing is crucial for specific elements, ensure they exist as vector shapes or separate layers in your Photoshop file before importing.
Rasterized Elements
Certain complex Photoshop features don’t have direct equivalents in Canva’s design environment.
Advanced layer effects, sophisticated blend modes, detailed adjustment layers, and complex smart object transformations may be rasterized during import.
Rasterization converts these elements into flat image pixels, preserving their visual appearance but removing the ability to adjust the underlying effects or properties.
Common elements that often rasterize include inner shadows with complex contours, pattern overlays with custom patterns, advanced blending modes like hard mix or pin light, and layer effects applied to smart objects. While the visual result is preserved, you won’t be able to modify these specific effects after import.
Scanned Documents and Merged Designs
If your Photoshop file contains scans of physical documents, photographs of designs, or imported flat images, Canva can only process these as single merged images.
The platform cannot separate text from images, extract individual design elements, or break apart components that existed as a unified pixel layer in Photoshop.
For maximum editability when importing to Canva, ensure your Photoshop design maintains separate layers for text, shapes, images, and effects rather than merging everything into a single background layer before export.
Best Practices for Converting PSD for Canva
Following these strategic approaches ensures optimal results when you import PSD to Canva, maintaining maximum quality and editability while avoiding common conversion issues.
Organize Your Photoshop Layers Before Importing
Clean layer organization in Photoshop translates to better structure in Canva.
Before importing, review your layers panel and delete any hidden or unused layers that serve no purpose.
Group related elements using layer folders to maintain logical organization.
Rename layers with clear, descriptive names so you can quickly identify elements after they’re imported into Canva.
This preparation makes the editing process in Canva much more intuitive.
Optimize File Size Without Sacrificing Quality
While Canva supports PSD files up to 300MB, smaller files upload and process faster.
Reduce file size by flattening any adjustment layers you no longer need to modify, deleting empty layers, and ensuring images are appropriately sized for your final use.
If your design includes extremely high-resolution images that exceed display requirements, consider resizing them in Photoshop before import.
However, never compromise quality to the point where your design appears pixelated or degraded.
Use Standard Fonts for Better Matching
Photoshop designs using widely available fonts like Arial, Helvetica, Times New Roman, Georgia, or common Google Fonts have significantly higher success rates for exact font matching in Canva.
If you’ve used obscure or highly specialized fonts, expect that Canva will need to substitute alternatives.
Consider the design’s future editability when selecting fonts during the Photoshop creation stage.
Maintain Vector Elements as Shapes
Whenever possible, create graphic elements using Photoshop’s shape layers and vector tools rather than rasterizing them or painting with pixel brushes. Vector shapes have the best chance of converting to fully editable Canva elements with modifiable colors, strokes, and properties. If you need to include hand-drawn or custom artwork, keep these elements on separate layers from vector components.
Test Complex Effects Before Full Import
Photoshop’s extensive effects library includes many advanced options that don’t translate perfectly to Canva’s simpler environment.
Before importing an entire large-scale project, create a small test file containing examples of the specific effects, blend modes, and techniques you’ve used.
Import this test file to Canva and review how each element converts. This testing reveals which effects will need recreation or adjustment in Canva after import.
Document Your Color Palette
While many color fills transfer successfully, having your exact color values documented ensures consistency.
Before importing, note the hex codes or RGB values of your key brand colors, backgrounds, and important design elements.
This reference allows you to quickly correct any colors that shift slightly during conversion or to apply consistent colors to new elements you add in Canva.
Keep Photoshop Source Files Accessible
Always maintain your original PSD files even after successfully importing to Canva.
Canva’s import feature is excellent for everyday editing and collaboration, but Photoshop remains the superior environment for advanced photo manipulation, complex effects, and precision work.
If you need to make significant design changes, edit the original PSD and re-import rather than attempting to rebuild complex elements entirely within Canva.
Troubleshooting Common Import Issues
Even with proper preparation, you may occasionally encounter challenges when uploading Photoshop files to Canva. These solutions address the most frequent problems users experience.
File Size Exceeds 300MB Limit
If your PSD file is too large to import, you have several options.
First, flatten any adjustment layers or effect layers that you’ve already applied and don’t need to modify independently.
Second, check for unnecessarily high-resolution images embedded in your design and resize them to appropriate dimensions.
Third, consider splitting your design into multiple smaller PSD files if it’s a multi-page or complex project.
Finally, delete any hidden layers, unused channels, or saved selections that add to file size without contributing to the visible design.
Imported Design Looks Different from Original
Slight visual differences can occur due to font substitution, color profile differences, or rasterization of complex effects.
Compare the imported design to your original in Photoshop side by side.
Identify specific elements that changed, then adjust them in Canva using available tools. For text differences, manually select the correct font from Canva’s library.
For color shifts, use the color picker or enter exact hex codes to match your original palette.
For rasterized effects, apply Canva’s equivalent effects or accept the visual result if it’s close enough.
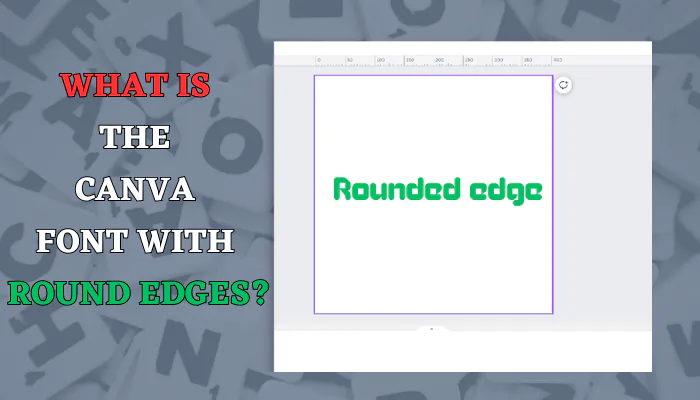
What is the Canva font with round edges?
Canva's round edged fonts are like friendly helpers in the design world. They bring warmth, friendliness, and a welcoming vibe to your ...
Text Isn’t Editable After Import
If text appears as an image rather than editable text, this typically means the text layer was rasterized in Photoshop before import, possibly through layer effects, filters, or manual rasterization.
Canva cannot convert pixel-based text back to editable type.
You’ll need to recreate the text manually in Canva using text boxes, or return to your original Photoshop file, ensure text layers remain as type layers, and re-import.
Some Layers Are Missing After Import
Layers set to zero percent opacity or turned off in Photoshop won’t be imported to Canva.
Additionally, certain layer types like adjustment layers exist only to modify the appearance of layers beneath them and don’t contain visual content themselves, so they don’t appear as separate elements in Canva.
Review your Photoshop file to ensure all important layers are visible and contain actual content before importing.
Upload Fails or Gets Stuck Processing
If the upload process fails or appears frozen, first check your internet connection stability.
Large files require sustained upload speeds and any interruption can cause failures. Close unnecessary browser tabs that might be consuming resources.
Try uploading during off-peak hours when server traffic is lower. If problems persist, try compressing your PSD file or breaking it into smaller sections.
Clear your browser cache and cookies, or try a different browser entirely. Chrome and Firefox typically offer the best performance for Canva’s upload features.
Advanced Techniques for PSD to Canva Workflow
Once you’ve mastered basic PSD import to Canva, these advanced strategies help you build efficient, professional workflows that leverage the strengths of both platforms.
Creating Template Systems Across Platforms
Design master templates in Photoshop with complex effects, professional photo editing, and precise typography.
Import these templates to Canva where team members can easily customize text, swap images, and adjust colors without needing Photoshop expertise.
This approach combines Photoshop’s power with Canva’s accessibility, perfect for marketing teams, agencies, or businesses with diverse skill levels.
Batch Processing Multiple Designs
When you have numerous similar designs to import, organize them in a dedicated folder on your computer with consistent naming conventions.
Upload multiple PSD files simultaneously through Canva’s Uploads tab by selecting all files at once.
Canva processes them in sequence, saving significant time compared to individual uploads. After processing, you can quickly access all imported designs from your Uploads folder.
Maintaining Brand Consistency
Import your primary brand assets, logos, and design elements from Photoshop to Canva once, then save them to your brand kit or organize them in dedicated folders.
This ensures consistent use of professionally-created assets across all team members while allowing easy customization for specific campaigns.
Use Photoshop for creating high-quality assets and Canva for rapid deployment and variation creation.
Collaborative Design Workflows
Design complex layouts and perform detailed photo editing in Photoshop, then import to Canva where multiple team members can collaborate simultaneously on text updates, localization, or variant creation.
Canva’s real-time collaboration features combined with Photoshop’s professional capabilities create powerful hybrid workflows for modern design teams.
Responsive Design Adaptation
Create your primary design at high resolution in Photoshop with all detail and effects perfected.
Import to Canva, then use Canva’s Magic Resize feature to quickly adapt the imported design to multiple platform sizes.
This combines Photoshop’s precision with Canva’s convenience for multi-platform content creation.
What is the Canva font with round edges?
Canva's round edged fonts are like friendly helpers in the design world. They bring warmth, friendliness, and a welcoming vibe to your ...
FAQ: Upload Photoshop Files to Canva
Can you directly upload PSD files to Canva?
Yes, you can now directly upload PSD files to Canva without converting them to image formats. This feature is available exclusively on canva.com through desktop browsers. Simply drag and drop your PSD file to the Canva homepage or editor, or use the upload buttons in various locations throughout the platform. Canva converts the PSD to an editable design while maintaining layers, text, and many design elements.
What is the maximum file size for uploading Photoshop files to Canva?
Canva accepts PSD files up to 300MB in size. This limit accommodates most professional design projects including those with multiple layers, high-resolution images, and complex compositions. If your Photoshop file exceeds this limit, you’ll need to optimize it by flattening unnecessary layers, reducing image resolution, or removing unused elements before importing.
Will my Photoshop layers remain editable in Canva?
Most Photoshop layers transfer to Canva as separate, editable elements. Your layer structure is largely preserved, allowing you to work with individual design components independently. However, certain complex effects, advanced blend modes, or intricate techniques may be rasterized during conversion, turning those specific elements into flat images. Text layers typically remain editable unless they were rasterized in Photoshop before import.
Why does my imported text look different in Canva?
Canva attempts to match fonts from your Photoshop file during conversion, but exact matches aren’t always possible due to the vast number of fonts available across platforms. When Canva cannot find your specific font, it substitutes the closest available alternative, which may result in slight differences in appearance, character width, or spacing. After import, you can manually change fonts to any available in Canva’s library or upload custom fonts with Canva Pro.
Can I edit colors in my imported Photoshop design?
Color editability depends on the original element type in your Photoshop file. Vector-based elements created with shape layers have a high chance of maintaining editable colors in Canva, allowing you to change fills and strokes directly. However, raster images including photographs or flattened pixel layers are imported as fixed images where individual color areas cannot be separately edited. For maximum color flexibility, ensure important elements exist as vector shapes in Photoshop before importing.
Is this PSD import feature available on Canva mobile apps?
No, the direct PSD import feature is currently only available on canva.com accessed through desktop browsers. Mobile apps and the Canva desktop application do not yet support direct Photoshop file imports. You must use a desktop web browser to upload and convert PSD files. Once imported and converted, you can access and edit the resulting Canva design from any device.
What happens to Photoshop smart objects and adjustment layers?
Photoshop smart objects and adjustment layers don’t have direct equivalents in Canva’s environment. During import, these elements are processed and their visual effects are applied, but the underlying editable properties are lost. Smart objects are flattened to regular layers, and adjustment layers are merged with the layers they affect. The visual result is preserved, but you cannot modify the original smart object content or adjustment parameters in Canva.
Conclusion
The ability to upload Photoshop files to Canva directly represents a significant advancement in cross-platform design workflows. You no longer need to flatten your carefully crafted layers or lose hours recreating designs. By following the step-by-step methods outlined in this guide, you can seamlessly import PSD files to Canva while maintaining editable text, layer structure, and design flexibility.
Whether you choose to upload from the Canva homepage for new projects or directly from the editor for integration with existing designs, the process is straightforward and efficient. Understanding what to expect during conversion, including the 300MB file size limit, font matching behavior, and which elements may be rasterized, helps you prepare your Photoshop files appropriately and set realistic expectations.
The key to success lies in proper preparation. Organize your Photoshop layers logically, use standard fonts when possible, maintain vector elements as shapes, and always keep your original PSD files accessible for major revisions. When you encounter conversion issues, the troubleshooting strategies provided help you quickly identify and resolve problems.
As this feature continues to evolve from its current beta status, you can expect even better compatibility and enhanced element retention. Canva’s commitment to improving the PSD import functionality based on user feedback means the conversion process will only get better over time. By mastering this workflow now, you position yourself at the forefront of modern, efficient design collaboration that combines Photoshop’s professional power with Canva’s accessibility and team collaboration features.
Start importing your Photoshop designs to Canva today and experience the seamless integration that transforms how you work across both platforms.
Last modified: October 8, 2025

