
How to slow down animation in Canva:
- Open the Design you want to edit.
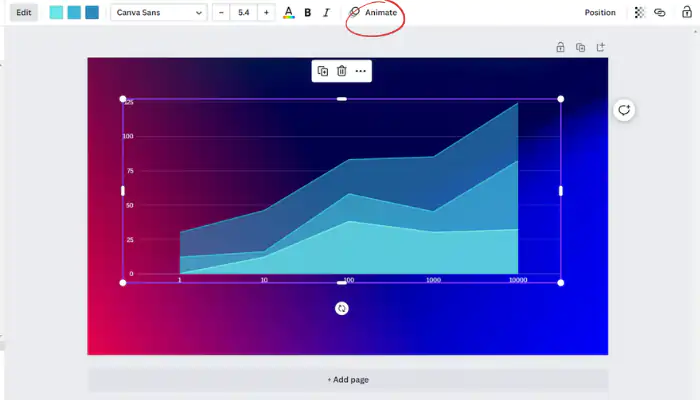
- Select the Element you want to add an animation to.
- Click the “Animate” tab in the top-side panel.
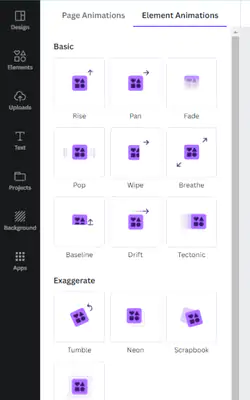
- Choose the animation you want to use from the list of available options.
- Adjust the animation speed by moving the slider to the left.
- Preview the animation to see how the changes affect the overall look of your design.
- Repeat the process until you’re satisfied with the speed of the animation.
Importance of slowing down animations
Canva is a graphic design platform that allows users to create professional designs for a variety of purposes, including social media graphics, presentations, and posters.
With Canva, users can easily add animations to their designs to add a touch of movement and interactivity. However, the default animation speed in Canva may not always be suitable for every design. This is why it’s important to know how to slow down animations in Canva.
In this article, we will explore the importance of slowing down animations in Canva and provide a step-by-step guide on how to do it.
We will also discuss best practices for slowing down animations, including recommendations for different types of animations and tips for creating visually appealing designs.
Why slow down animations in Canva
1. give audience time to take in information
One of the main purposes of animations in Canva is to grab the attention of your audience and draw them into your design. However, if the animation is too fast, your audience may not have enough time to take in all the information being presented.
By slowing down the animation, you can give your audience more time to process the information and understand the message you’re trying to convey.
2. improve user experience with animations in Canva
Fast-paced animations can be overwhelming and disorienting for some viewers, particularly if they have difficulty processing information quickly.
Slowing down the animation can help improve the user experience by making the design more accessible and easier to understand.
By understanding the importance of slowing down animations in Canva, you can create designs that are not only visually appealing but also effective in communicating your message to your audience.
Step-by-step guide to accessing animation settings:
Fortunately, slowing down animations in Canva is a straightforward process that can be done in just a few simple steps. Here is a step-by-step guide on how to do it:
1. Open the design you want to edit in Canva
2. Select the element you want to add an animation to
3. Click on the “Animations” tab in the top-side panel
4. Choose the animation you want to use from the list of available options
Explanation of animation speed options
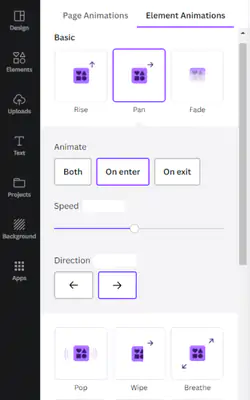
1. Canva provides adjustable options for the speed of your animation, and direction of your animation.
2. You can adjust the speed of your animation by using the slider tool in the animation settings panel.
3. This allows you to fine-tune the animation speed to match your specific needs.
Demonstration of how to adjust animation speed
1. Once you’ve selected the animation you want to use, you can adjust the speed by using the slider tool in the animation settings panel.
2. Move the slider to the right to make the animation faster or to the left to make it slower.
3. Preview the animation to see how the changes affect the overall look of your design.
4. Repeat the process until you’re satisfied with the speed of the animation.
By following these steps, you can easily slow down animations in Canva and create designs that are tailored to your specific needs and preferences.
Best practices for slowing down animations in Canva
While slowing down animations in Canva is simple, there are some best practices you should follow to ensure that your designs look their best. Here are a few recommendations to keep in mind:
Recommendations for different types of animations
1. For text-based animations, it’s best to choose a slower speed so that the text is easy to read.
2. For image-based animations, you can choose a faster speed as long as the images are still easily recognizable.
3. For animations that include a combination of text and images, it’s best to find a balance between readability and visual interest.
Tips for creating visually appealing animations
1. Use animations that complement the overall look and feel of your design.
2. Make sure that the animation fits the purpose of your design and enhances its message.
3. Experiment with different animation speeds to find the best balance between visual interest and readability.
How to determine the optimal animation speed for your design
1. Preview the animation at different speeds to see how it looks and how it affects the overall design.
2. Consider the purpose of the design and the message you want to convey when choosing the animation speed.
3. Pay attention to how the animation affects the readability of text and the recognizability of images.
4. Test the design with a sample audience to see how the animation speed affects their understanding of the message.
By following these best practices, you can create visually appealing animations in Canva that are optimized for your specific needs and that enhance the overall quality of your designs.
how to delay animation in canva
To delay animations in Canva, follow these steps:
- Select the Element to Animate: Click on the page or element that you want to animate. This will allow you to apply the animation to the selected item.
- Access Animation Options: On the toolbar above the editor, you’ll find the “Animate” button. Click on it to reveal the animation options in the side panel.
- Choose Animation Type: In the side panel, you’ll see various tabs such as “Page Animations,” “Element Animations,” “Photo Animations,” or “Text Animations.” Depending on your selection, choose the appropriate tab.
- Select Animation: Browse through the available animation styles and effects. To preview an animation, hover your mouse cursor over it. To apply an animation, click on the desired animation.
- Adjust Animation Timing: As of now, Canva does not support changing the timing of animations or making them appear on click. However, you can control the duration of the animated page before it transitions to the next page. To do this:
- Click or tap to select the page that contains the animation.
- Click or tap on the clock icon in the editor toolbar.
- Use the slider or text box to set the desired duration for the page to play.
Remember that animations will appear based on the position of your elements: top to bottom and then left to right.
- Create Animations (Optional): If you want to create animations from scratch, you can do so by following these steps:
- Click to select the page or element you’d like to animate.
- Click on the “Animate” icon in the toolbar above the editor.
- Choose “Create an animation” under the appropriate tab (Photo animations or Element animations).
- Click and drag the element or photo to create your animation.
- Choose your preferred movement style and adjust the speed accordingly. You can also toggle “Orient element to Path” if needed.
- Click “Done” to save your animation or “Delete” to remove it.
- Share Animated Designs: Once you’ve created animations, you can share your designs as videos or GIFs. You can also directly share them on social media or schedule them for later.
Please note that each animation can only be 10 seconds long at the maximum, and a design can have a maximum of 50 animations created.
As of the information provided, Canva does not yet support delaying animations or changing the order of animations directly. However, keep an eye out for updates as Canva may introduce these features in the future.
Conclusion
Animations are a powerful tool in Canva for grabbing the attention of your audience and conveying important information. By slowing down animations, you can ensure that your designs are not only visually appealing but also effective in communicating your message.
As you create animations in Canva, it’s important to remember that the speed of your animations can make a big difference in how your designs are perceived by your audience. By slowing down animations, you can ensure that your designs are clear, readable, and effective in conveying your message.
References and Further Reading
find more info in Canva support page here or find another article about how to animations in Canva here
Recommended articles and tutorials on Canva animations
There are several resources available online that can help you slow down animations in Canva. Here are five of the top results with helpful information on how to slow down animations in Canva:
By following the step-by-step instructions in these resources, you can easily adjust the duration of your animations in Canva and make them slower or faster.
Additional resources for improving your design skills in Canva
SLOWING DOWN Animations in Canva — Here’s What You Need to Know
How to ADJUST THE DURATION of your ANIMATIONS in Canva
Last modified: December 14, 2023

