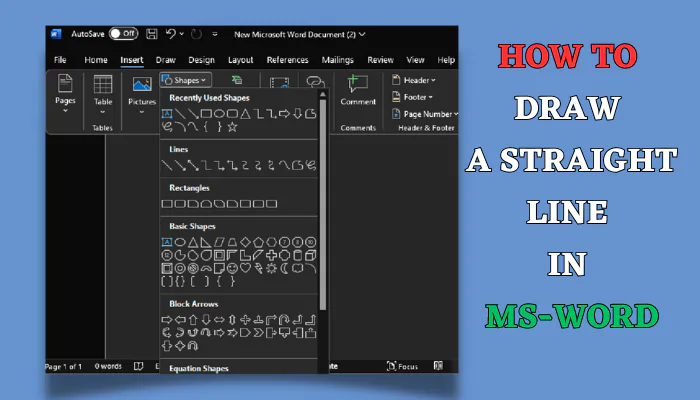
Drawing perfect straight lines and shapes in MS Word can be tricky without using the right techniques. This comprehensive guide will show you several easy methods to create precise horizontal, vertical, or diagonal straight lines using your mouse, keyboard shortcuts, or basic shape tools.
Using the Line Shape
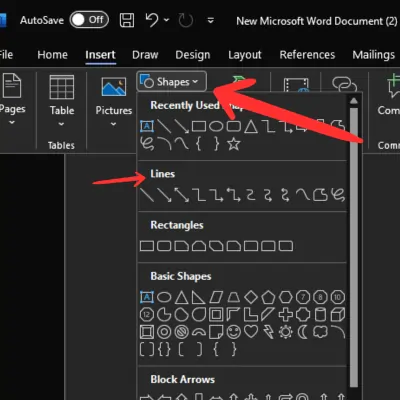
The easiest way to draw straight lines is using the Line shape:
- Go to the Insert tab and click Shapes
- Select the Line shape
- Hold the Shift key and click-drag to make a straight line
- Release the mouse button when finished
Holding Shift constrains the line so you can draw perfectly straight horizontal, vertical, or diagonal lines with your mouse. You can make the line longer or shorter by dragging the sizing handles on the ends.
Keyboard Shortcuts
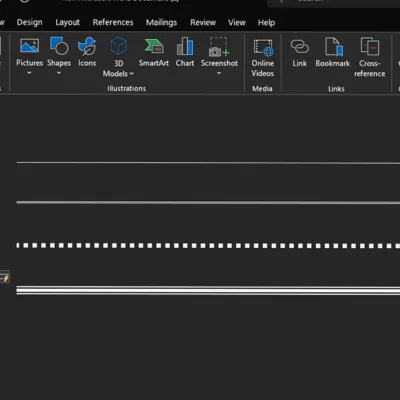
You can quickly insert common straight-line shapes with these handy keyboard shortcuts:
- – 3 times Then hit Enter – One Horizontal line shape
- === Then hit Enter – Double Horizontal line shape
- *** Then hit Enter – Dot Horizontal line shape
- ### Then hit Enter – Triple Horizontal line shape
Use these to rapidly insert basic straight lines for borders, dividers, etc.
Customizing Your Straight Lines
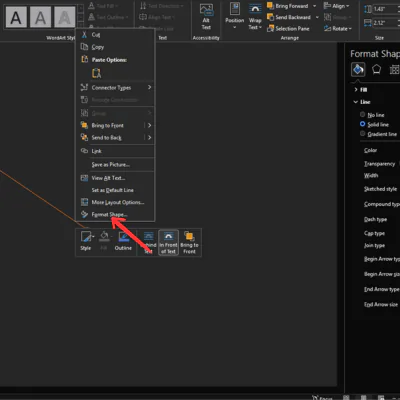
Once inserted, right-click the line shape and choose Format Shape to customize:
- Color: Choose from theme colors or custom colors
- Width: Set line thickness from 0.25 to 15 points
- Dashes: Solid, round dot, square dot, dash, long dash, dot dash styles
- Arrows: Add and edit arrowheads at one or both ends
- Joins: Set bevel, miter and round line joins
- Rotate or Flip: Rotate or flip line for different angles
- Align/Position: Align relative to text, page margins, or other objects
Advanced Straight Line Options
Under the Format Shape menu you can also find more advanced options:
- 3-D Rotation: Rotate the line in 3D space
- Text Box: Add text along the path of the line
- Wrap Text: Make text wrap around the line object
- Glow & Soft Edges: Add visual effects like glows and soft edges
- 3D Effects: Add depth, shadows, and 3D perspectives
- Alt Text: Add invisible text for accessibility
So you can create more complex straight lines and background line shapes by leveraging these tools.
Aligning Straight Lines
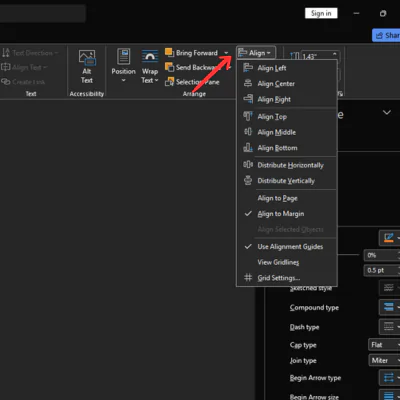
Accurately aligning your lines takes a bit more work but can help create professional diagrams and figures:
- Group the line objects together
- Go to Layout Select Align Objects > Align Center, Align Middle, etc.
- Use Distribute Horizontally or Vertically for even spacing
- Align or justify grouped objects relative to page or margins
Grouping lines before aligning allows precise alignment.
Straight Line Uses
Some of the most common uses for straight lines in documents include:
- Borders and dividers
- Timelines and graphs
- Tables and forms
- Callout lines and arrows
- Drawing shapes and geometry figures
Lines are essential graphical elements in Word docs when used creatively.
Troubleshooting Guide
Can’t get perfectly straight lines?
Make sure to hold Shift when dragging the line shape. Avoid holding the mouse at an angle.
The line suddenly becomes crooked.
Accidentally releasing Shift while drawing can skew the line. Delete and redraw.
Need accurate measurements?
Right-click> Format Shape to see exact line dimensions.
Does the line disappear when typing?
The line is set to “Behind Text“. Bring in front of text with Format Shape > Send Forward.
Frequently Asked Questions
What is the easiest method for straight lines?
The Line shape while holding Shift as you drag is the simplest method.
How do I draw a vertical line in Word?
Use the line shape and hold the shift key when you draw the line, now you can draw perfect vertical lines.
Can I format or customize a straight line?
Yes! Use Format Shape to change the color, style, arrows, etc.
How do I align multiple lines precisely?
Group the lines before choosing the Align Objects options.
Let me know if you have any other straight-line questions!
Read More Information
How To Place Horizontal and Vertical Lines in Word
