Canva is being used extensively and many new users no longer learn professional design software like Photoshop for designing. Even professional Photoshop users use Canva for simple tasks.
Since no software in the world is perfect and always has some limitations, Canva is no exception. It has some constraints, some of which are unresolvable while some can be solved with a little effort.
In this article, we want to address how to solve one of these challenges that has stumped many users.
Perhaps you also decided to use shapes in one of your designs. With its vast collection of shapes, Canva has made your designing easy. Despite the huge variety, you may sometimes need a shape different from the default Canva shapes. Here are two ways to create a custom shape:
Method 1: Design the Shape in Illustrator
In this method, you can design any shape you want and then save your file as an SVG.
Next, upload this file in Canva and use it as a custom shape in your designs. If you want to learn more about this, check out the post below.
Method 2: Shape Cropping in Canva
The second method is done entirely within Canva. The process is quite simple:
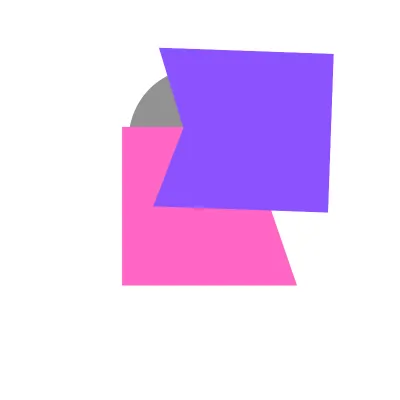
First, find a shape in Canva similar to what you need. Then, cover the first shape with new shapes using shape moving or rotating.

Note that the shapes to be layered on top should match the background color to appear invisible on the design page. This way you can create endless new shapes using Canva’s shape library.

The limitation is that you cannot use this technique on multi-colored (Gradient) backgrounds or with an image in the background.

With these two methods explained, you can now easily create beautiful, custom shapes to use in your designs. This is the only precise solution on the internet for this problem that we have prepared for you dear readers. Please reference our website as the original source if you want to teach this method to others.
Elements Cropping in Canva
Cropping is the process of trimming or cutting parts of an image or element to achieve the desired composition. In Canva, this feature allows you to refine your designs and create a polished look. Follow these steps to crop elements effortlessly:
Step 1: Open Your Design
Begin by opening your Canva design. Whether it’s a social media post, flyer, or presentation, the cropping feature is applicable to various design types.
Step 2: Select the Element
Identify the specific element you wish to crop. Click on it to select and activate the editing options.
Step 3: Access the Crop Tool
Look for the “Crop” option in the toolbar. It often appears as a square with a corner missing. Click on it to reveal the cropping options.
Step 4: Adjust the Crop Handles
A bounding box with handles will appear around the selected element. Click and drag these handles to adjust the size of the element according to your preference.
Step 5: Confirm the Crop
Once satisfied with the adjustments, hit the “Apply” or “Done” button. Your element is now cropped, giving your design a more focused and refined appearance.
Additional Tips and Tricks
Enhance your Canva journey with these tips:
Utilizing Keyboard Shortcuts:
- Ctrl + Z: Undo
- Ctrl + Y: Redo
- Ctrl + C: Copy
- Ctrl + V: Paste
- Ctrl + X: Cut
- Ctrl + A: Select all
- Ctrl + Shift + D: Duplicate
- Ctrl + Shift + M: Center align
- Ctrl + Shift + L: Left align
- Ctrl + Shift + R: Right align
Exploring Advanced Features:
- Background Remover: Easily remove image backgrounds.
- Shape Combiner: Combine shapes for custom designs.
- Transparency Tool: Adjust image or shape opacity.
- Snap to Grid: Precise alignment for complex designs.
Collaborating Shapes and Elements in Canva
Sharing Design Links
Collaboration starts with sharing, and Canva makes it a breeze. Follow these simple steps:
- Finish Your Design:
- Before sharing, ensure your design is polished and ready to impress.
- Click on Share:
- At the top right, find the “Share” button.
- Generate Shareable Link:
- Click “Share” and then “Copy link.” Now, your design is shareable!
Granting Permissions to Collaborators
Collaboration thrives on teamwork, and Canva allows you to control who can contribute. Here’s how:
- Access Share Settings:
- Click on “Share” and then “Share with others.”
- Set Permissions:
- Choose between “View” and “Edit” access. Decide if collaborators can only see or also edit your design.
- Add Collaborator Emails:
- Enter email addresses to invite collaborators. Click “Done.”
- Send Invitations:
- Collaborators receive an email with an invitation. Once accepted, they can join the creative journey!
Exporting Designs for Different Purposes
Sharing isn’t limited to Canva itself; you can export your designs for various needs.
Exporting as an Image or PDF
- Click on Download:
- At the top right, find the “Download” button.
- Choose File Type:
- Pick between image (JPEG or PNG) or PDF. Select your preferred quality.
- Download Your Design:
- Click “Download,” and voila! Your design is ready for sharing beyond Canva.
Collaborating Beyond Canva
- Export as a Canva Template:
- If you’ve crafted a masterpiece, share it as a template. Click “More” and then “Make a copy.” Set it as a template.
- Share Template Link:
- Click “Share” and then “Copy link.” Now, others can use your design as a template in their Canva journey.
Tips for Effective Collaboration
- Communicate Clearly:
- Use Canva’s built-in comments to communicate ideas and feedback.
- Version Control:
- Save different versions of your design to track changes or experiment with new ideas.
- Regularly Update Collaborators:
- Keep your collaborators in the loop about design progress and any important changes.
- Respect Permissions:
- When sharing, ensure collaborators have the right permissions for a smooth collaboration experience.
Conclusion
shape cropping in Canva allows designers to create unique shapes beyond the default options. By following the simple steps outlined in this guide, anyone can design custom shapes, expanding their creative capabilities within Canva. Whether you’re a beginner or experienced user, shape cropping opens new possibilities to enhance your graphics.
FAQs
What file format should I use to import custom shapes into Canva?
SVG (Scalable Vector Graphics) is the recommended file format for importing custom shapes into Canva.
Can I crop shapes on top of images or multi-colored backgrounds in Canva?
Unfortunately, shape cropping only works on solid color backgrounds in Canva.
Is there a limit to how many custom shapes I can create through shape cropping?
No, you can create an unlimited number of custom shapes using the shape cropping technique in Canva.
Do I need a paid Canva subscription to use custom shapes?
No, you can use custom shapes with both free and paid Canva accounts. Importing shapes only requires the desktop version.
What’s the benefit of creating shapes in Canva vs. Illustrator?
Designing shapes directly in Canva allows faster workflow within one program. But Illustrator provides more advanced shaping tools if needed.


